🔗 Using LLMs for Few-Shot Token Classification Suggestions with spacy-llm#
This tutorial will guide you through a Named Entity Recognition (NER) pipeline using spacy-llm and few-shot learning. The steps will be as follows:
Run Argilla and load
spacy-llmalong with other librariesDefine few-shot examples for the model
Define config for your pipeline and initialize it
Create
TokenClassificationRecordand store the inferences in itPush to Argilla
Introduction#
NER is a Natural Language Processing task where tokens are categorized into pre-defined categories such as person, organization or place as named entities. Thus, NER is one of the primary steps to turn unstructured data into structured data. With Argilla, you will have the opportunity to validate and annotate the named entities that you obtain from your NER pipeline.
spacy-llm is a package that integrates the strength of LLMs into regular spaCy pipelines, thus allowing quick and practical prompting for various tasks. Besides, since it requires no training data, the models are ready to use in your pipeline. If you want to train your own model or create your custom task, spacy-llm also helps to implement any custom pipeline.
In this tutorial, we will create a spacy-llm pipeline to perform NER on banking77 dataset. It is a dataset consisting of online banking queries by customers and their annotations with the corresponding intents. We will show our model a few positive and negative examples to improve its performance, where we will actually have defined a category for a specific named entity.
Running Argilla#
For this tutorial, you will need to have an Argilla server running. There are two main options for deploying and running Argilla:
Deploy Argilla on Hugging Face Spaces: If you want to run tutorials with external notebooks (e.g., Google Colab) and you have an account on Hugging Face, you can deploy Argilla on Spaces with a few clicks:

For details about configuring your deployment, check the official Hugging Face Hub guide.
Launch Argilla using Argilla’s quickstart Docker image: This is the recommended option if you want Argilla running on your local machine. Note that this option will only let you run the tutorial locally and not with an external notebook service.
For more information on deployment options, please check the Deployment section of the documentation.
Tip
This tutorial is a Jupyter Notebook. There are two options to run it:
Use the Open in Colab button at the top of this page. This option allows you to run the notebook directly on Google Colab. Don’t forget to change the runtime type to GPU for faster model training and inference.
Download the .ipynb file by clicking on the View source link at the top of the page. This option allows you to download the notebook and run it on your local machine or on a Jupyter Notebook tool of your choice.
Setup#
You will need to install some libraries along with Argilla for this tutorial.
[ ]:
!pip install "spacy-llm[transformers]" argilla datasets -qqq
And let us import the required libraries.
[ ]:
import os
import json
import configparser
import argilla as rg
from spacy_llm.util import assemble
from datasets import load_dataset
You need to initialize the Argilla client with API_URL and API_KEY:
[ ]:
# Replace api_url with the url to your HF Spaces URL if using Spaces
# Replace api_key if you configured a custom API key
# Replace workspace with the name of your workspace
rg.init(
    api_url="http://localhost:6900",
    api_key="owner.apikey",
    workspace="admin"
)
If you’re running a private Hugging Face Space, you will also need to set the HF_TOKEN as follows:
[ ]:
# # Set the HF_TOKEN environment variable
# import os
# os.environ['HF_TOKEN'] = "your-hf-token"

# # Replace api_url with the url to your HF Spaces URL
# # Replace api_key if you configured a custom API key
# # Replace workspace with the name of your workspace
# rg.init(
#     api_url="https://[your-owner-name]-[your_space_name].hf.space",
#     api_key="owner.apikey",
#     workspace="admin",
#     extra_headers={"Authorization": f"Bearer {os.environ['HF_TOKEN']}"},
# )
To be able to use GPT3.5 and other models from OpenAI with spacy-llm, we’ll need an API key from openai.com and set it as an environment variable.
[ ]:
os.environ["OPENAI_API_KEY"] = <YOUR_OPENAI_API_KEY>
Enable Telemetry#
We gain valuable insights from how you interact with our tutorials. To improve ourselves in offering you the most suitable content, using the following lines of code will help us understand that this tutorial is serving you effectively. Though this is entirely anonymous, you can choose to skip this step if you prefer. For more info, please check out the Telemetry page.
[ ]:
try:
    from argilla.utils.telemetry import tutorial_running
    tutorial_running()
except ImportError:
    print("Telemetry is introduced in Argilla 1.20.0 and not found in the current installation. Skipping telemetry.")
Load dataset#
Let us import our dataset from HuggingFace hub.
[ ]:
dataset_hf = load_dataset("banking77", split="train")
We can see a sample from the dataset to view what it consists of.
[ ]:
dataset_hf.to_pandas().head()
spacy-llm pipeline#
There are two ways to implement a spacy-llm pipeline for your LLM task: running the pipeline in the source code or using a config.cfg file to define all settings and hyperparameters of your pipeline. In this tutorial, we’ll work with a config file and you can have more info about running directly in Python here.
Before defining the pipeline, let us first create the examples that will be used for few-shot learning by our model.
Few-shot examples#
In spacy-llm, you have the opportunity to inject your examples into the prompt to the LLM. As it will enhance the performance for your specific task, spacy-llm makes it very easy to have few-shot examples in your pipeline. You can have detailed info here.
Let us define some very basic example sentences in json format.
[ ]:
json_file = [
  {
    "text": "I was charged with an exchange rate for my purchase and it was not right.",
    "spans": [
      {
        "text": "charged",
        "is_entity": 'false',
        "label": "==NONE==",
        "reason": "is an action done to the customer by the bank, not by them"
      },
      {
        "text": "purchase",
        "is_entity": "true",
        "label": "ACTIVITY",
        "reason": "is an action that the customer did, not the bank"
      }
    ]
  },
  {
    "text": "The exchange rate for the last item I bought seems to be correct.",
    "spans": [
      {
        "text": "exchange rate",
        "is_entity": "false",
        "label": "==NONE==",
        "reason": "is a name for currency, not an action or performance"
      },
      {
        "text": "item",
        "is_entity": "false",
        "label": "==NONE==",
        "reason": "is a generic name for the object bought, not a performance"
      },
      {
        "text": "bought",
        "is_entity": "true",
        "label": "ACTIVITY",
        "reason": "is the verb for the action that the customer performed"
      }
    ]
  }
]
Note that we have introduced both positive and negative examples. Besides positive ones, telling the model that certain token(s) are not named entities in certain contexts will improve the performance even more.
Dump the json file in the base directory.
[ ]:
with open("fewshot.json", "w") as outfile:
    json.dump(json_file, outfile)
Configure the pipeline#
Let us create the spacy-llm pipeline with settings and parameters via config.cfg. We will implement the NER task, which we define in the pipeline command. Then, we add our components to our pipeline to specify the task with its model and hypermeters.
[ ]:
config_string = """
  [paths]
  examples = "fewshot.json"

  [nlp]
  lang = "en"
  pipeline = ["llm","sentencizer"]

  [components]

  [components.llm]
  factory = "llm"

  [components.llm.task]
  @llm_tasks = "spacy.NER.v3"
  labels = ["PERSON", "ORGANIZATION", "CARDINAL", "PERCENT", "ACTIVITY"]

  [components.llm.task.examples]
  @misc = "spacy.FewShotReader.v1"
  path = "${paths.examples}"

  [components.llm.model]
  @llm_models = "spacy.GPT-3-5.v1"
  config = {"temperature": 0.5}

  [components.sentencizer]
  factory = "sentencizer"
  punct_chars = null
"""
Note that the labels should include any custom-named entity we have defined in few-shot examples. Otherwise, the model will come up with its own definition of the custom-named entity and run accordingly, which might be a problem for specific named entities.
spacy-llm offers various models to implement in your pipeline. You can have a look at the available OpenAI models as well as check the HuggingFace models offered if you want to work with open-source models.
Now, with ConfigParser, we can create the config file.
[ ]:
config = configparser.ConfigParser()
config.read_string(config_string)

with open("config.cfg", 'w') as configfile:
   config.write(configfile)
Let us assemble the config file.
[ ]:
nlp = assemble("config.cfg")
We can now use the model to generate predictions.
[ ]:
doc = nlp("The same item is 50% more expensive now, so they did not purchase it.")
doc.ents
Dataset#
Now that we have a functioning pipeline for our NER task, we can now create a TokenClassificationRecord to store the inferences in it. We will use the pipeline to generate predictions for our dataset and store them in the record.
Create records#
We will store the tokens and predictions in a TokenClassificationRecord. Let us create a tokenizer function to tokenize the sentences in our dataset.
[ ]:
def tokenizer(doc):
  return [token.text for token in doc]
Let us create a list of records from the dataset items. See the documentation for more information on what other fields you can add to your record.
[ ]:
records = [
    rg.TokenClassificationRecord(
        text=doc.text,
        tokens=tokenizer(doc),
        prediction=[(ent.label_, ent.start_char, ent.end_char) for ent in doc.ents],
        prediction_agent="gpt-3.5-turbo"
    ) for doc in [nlp(item) for item in dataset_hf["text"]]
]
Let us create DatasetForTokenClassification from the list of records.
[ ]:
dataset = rg.DatasetForTokenClassification(records)
Push to Argilla#
Push the dataset to Argilla using rg.log
[ ]:
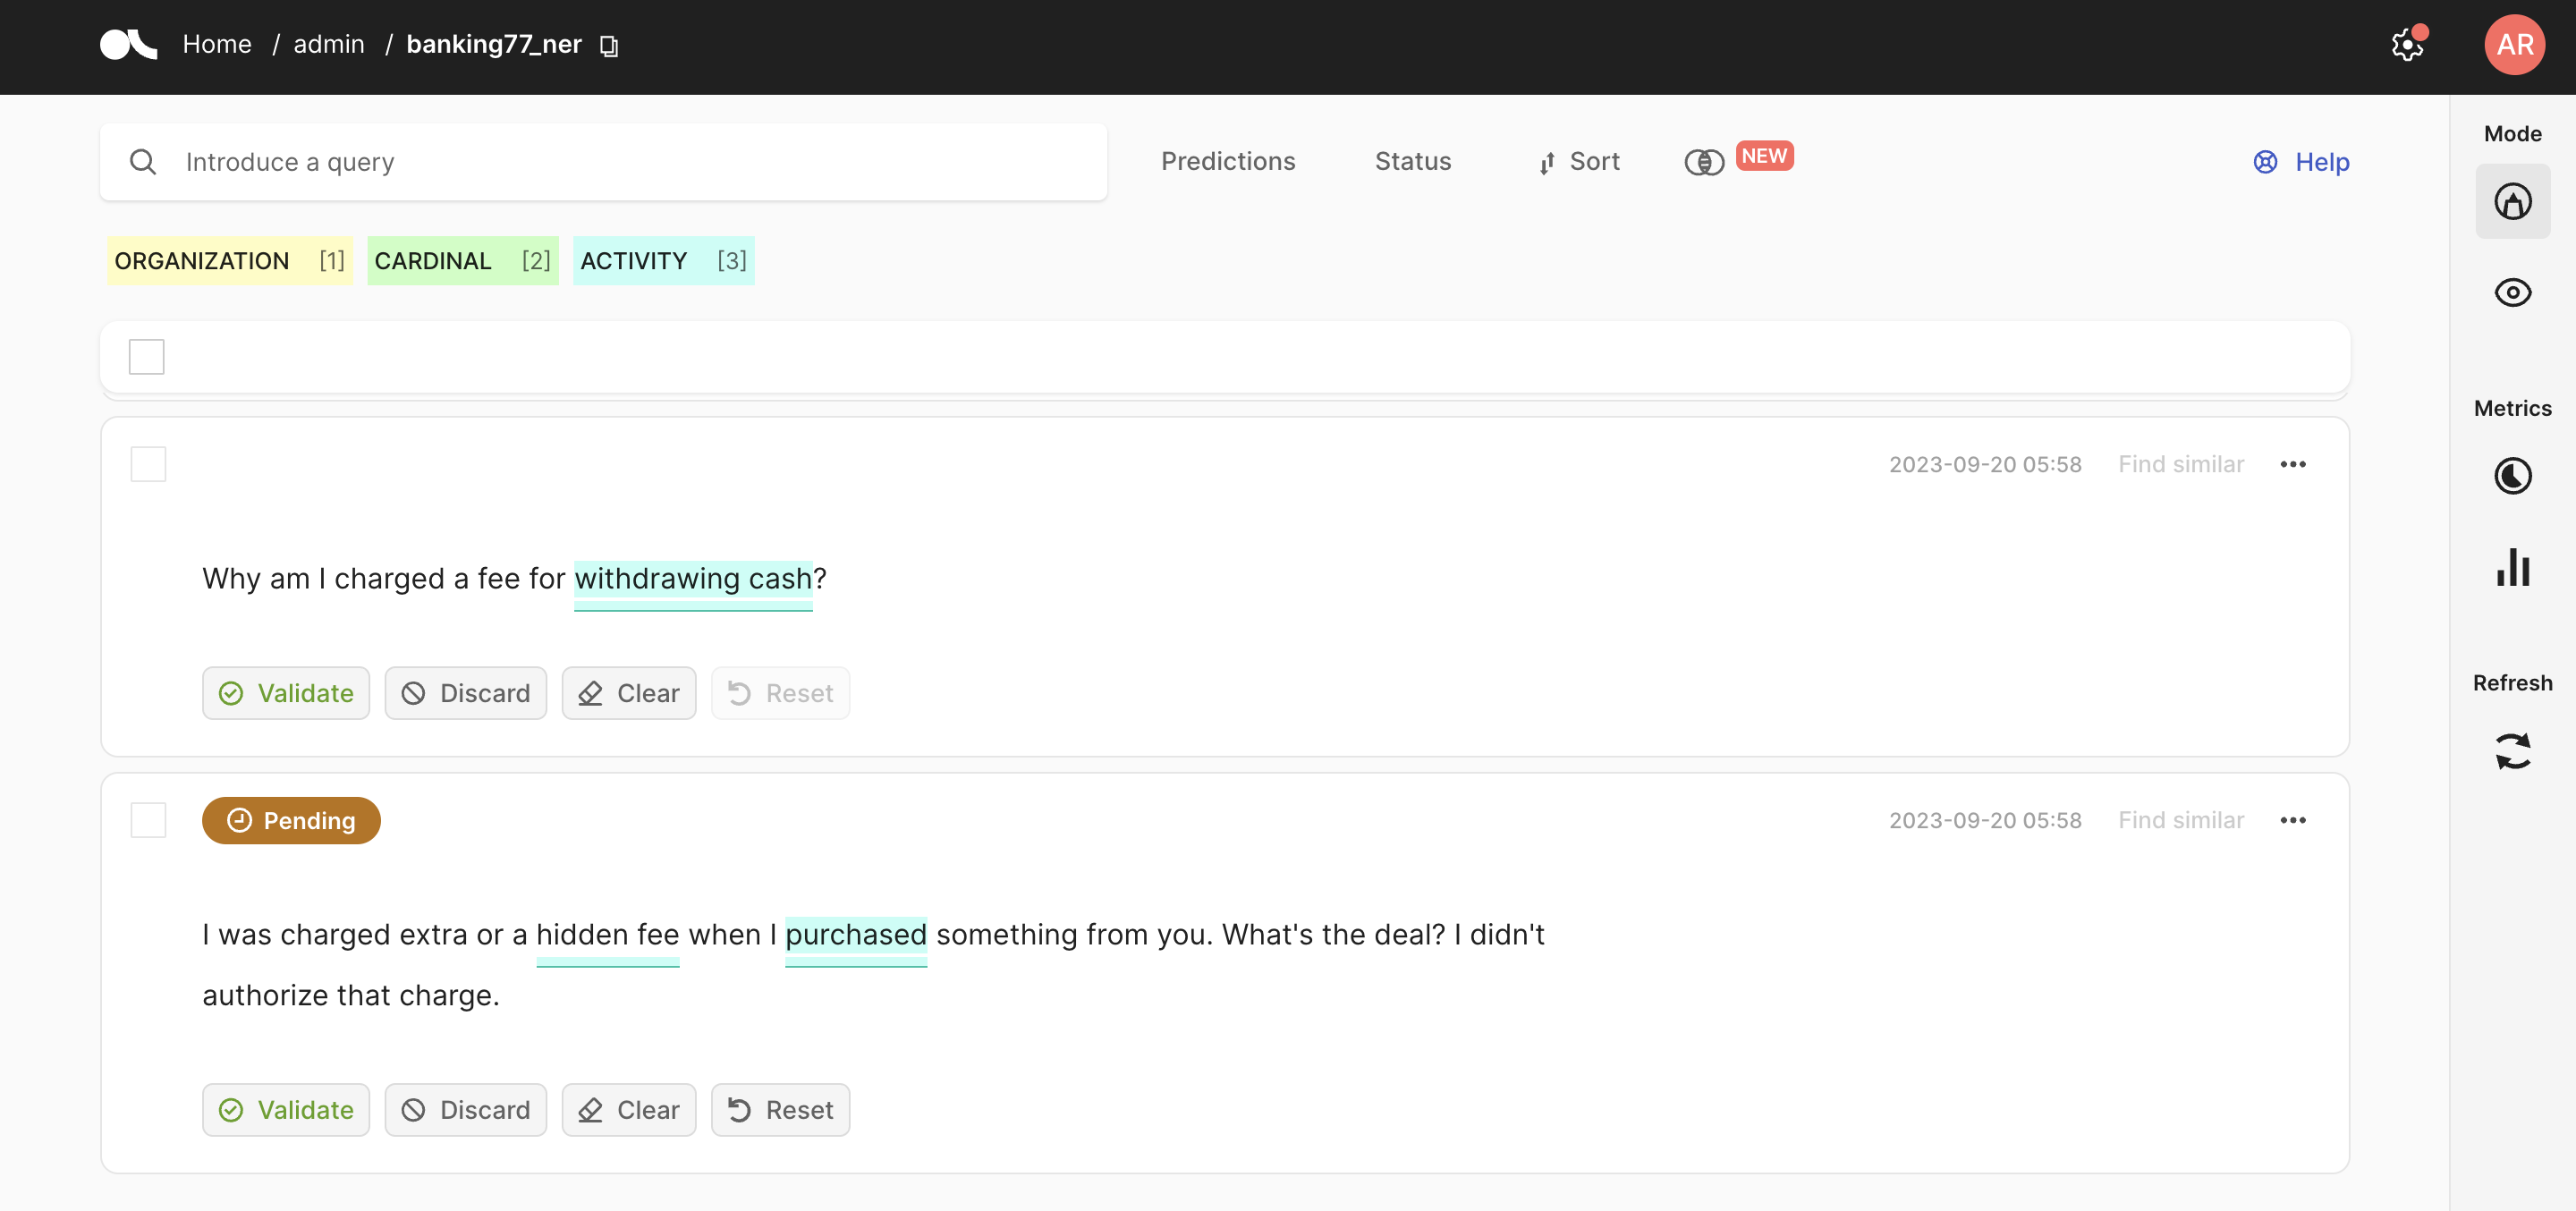
rg.log(dataset, "banking77_ner", workspace="admin")
Our dataset is now ready to be annotated with predictions from GPT3.5! You can validate or discard the predictions made by the model.
In this tutorial, we have implemented a spacy-llm pipeline for the NER task by using model predictions from GPT3.5. In addition, we employed a few-shot learning approach to improve the performance of our model, which is facilitated by spacy-llm. You can see more tutorials on the use of spaCy with Argilla here