🗂️ Assign records to your annotation team#
In this tutorial, you will learn how to assign records to specific users so that you can avoid or control the overlap in annotations. It will walk you through the following steps:
📥 Loading a dataset
🔀 Make a random assignment
💾 Log your dataset and assignments in Argilla
✍️ Annotate records assigned to you
Introduction#
Annotations are often done by teams that share the workload. When this is the case, we want to avoid annotation overlap for efficiency or to control when and how this overlap happens. To do this in Argilla (v1.6.0) we have two options:
we can keep a single dataset and assign a set of records to each user.
we can split our dataset into different datasets that have the records assigned to each user and log them in their personal workspaces.
You may want to use option 1 if you want to keep the whole dataset available to see and explore for every team member but still you want them to focus on a set of records when they annotate. This can be interesting if your annotators will also make weak labeling rules based on the annotations of the whole team.
Option 2 is better if you want each team member to work independently and not see the records that other teammates are working on. This can be interesting if you want to measure annotator agreement afterwards.
In this tutorial, we will make a random assignment where each record is annotated by one person only and walk you through sharing your assignments with your team using each option.
Let’s get started!
Running Argilla#
For this tutorial, you will need to have an Argilla server running. There are two main options for deploying and running Argilla:
Deploy Argilla on Hugging Face Spaces: If you want to run tutorials with external notebooks (e.g., Google Colab) and you have an account on Hugging Face, you can deploy Argilla on Spaces with a few clicks:

For details about configuring your deployment, check the official Hugging Face Hub guide.
Launch Argilla using Argilla’s quickstart Docker image: This is the recommended option if you want Argilla running on your local machine. Note that this option will only let you run the tutorial locally and not with an external notebook service.
For more information on deployment options, please check the Deployment section of the documentation.
Tip
This tutorial is a Jupyter Notebook. There are two options to run it:
Use the Open in Colab button at the top of this page. This option allows you to run the notebook directly on Google Colab. Don’t forget to change the runtime type to GPU for faster model training and inference.
Download the .ipynb file by clicking on the View source link at the top of the page. This option allows you to download the notebook and run it on your local machine or on a Jupyter notebook tool of your choice.
Setup#
For this tutorial, you’ll need to install the Argilla client and a few third party libraries using pip:
[ ]:
%pip install argilla==1.6.0 datasets==2.10.1 httpx==0.23.3 -qqq
Let’s import the Argilla module for reading and writing data:
[1]:
import argilla as rg
If you are running Argilla using the Docker quickstart image or Hugging Face Spaces, you need to init the Argilla client with the URL and API_KEY:
[ ]:
# Replace api_url with the url to your HF Spaces URL if using Spaces
# Replace api_key if you configured a custom API key
rg.init(
    api_url="http://localhost:6900",
    api_key="admin.apikey"
)
📥 Loading a dataset#
We can work with a dataset that already exists in Argilla or load a completely new dataset.
Load an existing Argilla dataset#
We can load a whole dataset that was already logged in our Argilla instance or a selection of records in a dataset defined by a query. In this case, we have included a query so that we only load the records that haven’t been annotated yet. Learn more about queries here.
[ ]:
# load records with the "Default" status from a dataset
ds = rg.load("gutenberg_spacy-ner", query="status:Default")
Create a new dataset#
If you’re working with a new dataset, then you’ll need to create a new Argilla dataset object. Here, we have loaded the same dataset from the Huggingface hub.
[ ]:
from datasets import load_dataset

ds = rg.DatasetForTokenClassification.from_datasets(
    dataset=load_dataset('argilla/gutenberg_spacy-ner', split='train')
)
Learn more about loading and creating Argilla datasets here.
🔀 Make a random assignment#
As a first step, we want to get the list of the users that will be annotating our dataset.
[ ]:
import httpx

rg_client= rg.active_client().client
auth_headers = {"X-Argilla-API-Key": rg_client.token}
http=httpx.Client(base_url=rg_client.base_url, headers=auth_headers)

# make a request using our Argilla Client
users = http.get("/api/users").json()

# optional: filter users to get only those with annotator role
users = [u for u in users if u['role']=='annotator']
We will shuffle our dataset so that the assignment is random, but this step is optional.
[ ]:
# skip this cell if you don't want to shuffle the dataset
import random

random.shuffle(ds)
Now we are ready to start making the assignments. To do this, we will divide our dataset in chunks of the same length as the available annotators and save the assignments in a dictionary.
[ ]:
from collections import defaultdict

# build a dictionary where the key is the username and the value is the list of records assigned to them
assignments = defaultdict(list)

# divide your dataset in chunks of the same length as the users list and make the assignments
n = len(users)
chunked_records = [ds[i:i + n] for i in range(0, len(ds), n)]
for chunk in chunked_records:
    for idx, record in enumerate(chunk):
        assignments[users[idx]['username']].append(record)
💾 Log your dataset and assignments in Argilla#
Option 1#
If you want to follow option 1, where we have 1 dataset accessible to all teammates, you need to save the assignments as record metadata before logging them.
Make sure that you log this dataset in a workspace that all the users that will work on it have access to.
[ ]:
# loop through the assignments dictionary to save the metadata and build a list with all records
assigned_records = []
for user, records in assignments.items():
    for record in records:
        record.metadata['user'] = user
        assigned_records.append(record)

# log the records in Argilla
rg.log(
    records=assigned_records,
    workspace='recognai',
    name='gutenberg_spacy-ner',
    tags={'with assignments': True}
)
Option 2#
If you’re following option 2, where annotators only have access to the records assigned to them, you need to log each user’s assignments as a separate dataset in their indivudal workspace.
For this to work, users that are going to annotate should have the annotator role so that they cannot access each other’s workspaces. Whoever is supervising the project should have an admin role so they can see all workspaces and datasets tied to this project.
Learn more about managing user roles and access here.
[ ]:
# loop through the dictionary and log the dataset for each user
for user, records in assignments.items():
    rg.log(
        records=records,
        workspace=user,
        name='gutenberg_spacy-ner'
    )
Tip: If you plan to have more than one user annotating the same record, we recommend adding an ID to each record before splitting them into several datasets. That way you will be able to retrieve the different annotations for each record when postprocessing the datasets.
✍️ Annotate records assigned to you#
Now it’s time to open the Argilla UI and start annotating!
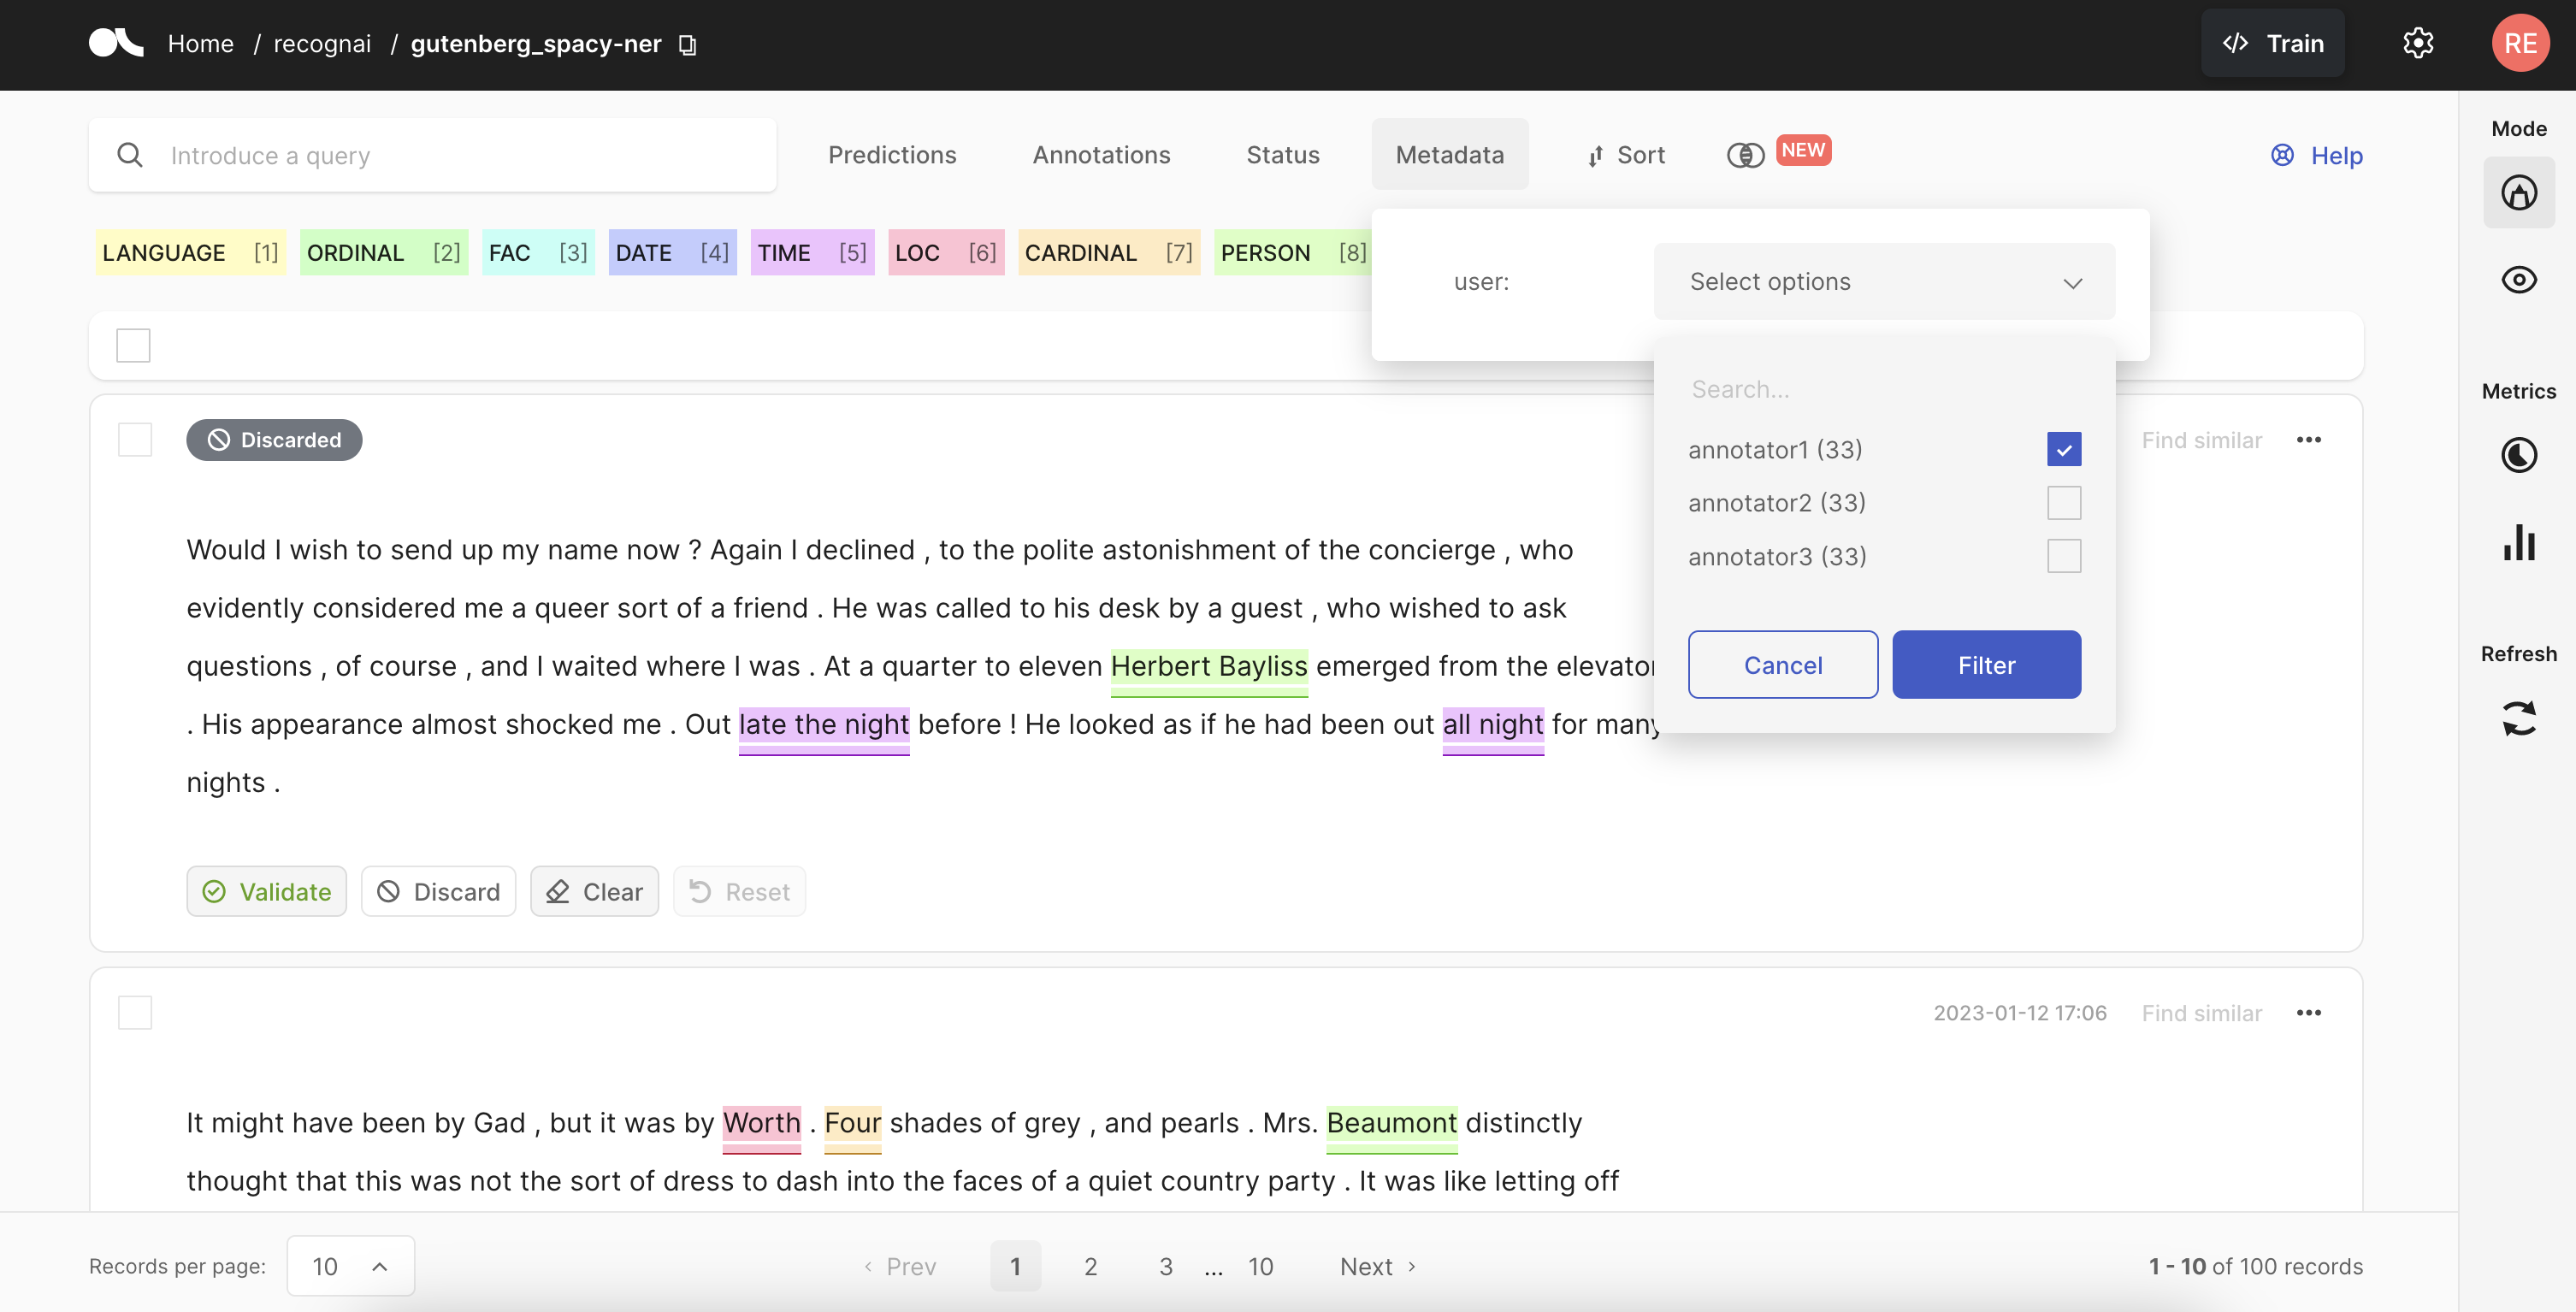
If you followed option 1, you want to ask your annotators to open the dataset in the UI and select their username under Metadata>user and click on the Filter button. This will filter the records assigned to them automatically.
If you followed option 2, just ask your annotators to open the dataset in their workspace and start annotating it.
Summary#
In this tutorial, we learned how to split a dataset into random chunks so you can assign records to each member of your annotation team in two ways. In the first way, we kept a single dataset so that our team can choose whether to see the whole dataset or focus on the records assigned to them. In the second way, each annotator has a dataset with the records assigned to them and they cannot access the records of other teammates.
This allows you to manage your annotation team and help them work more efficiently. 🚀
Next steps#
If you want to continue learning Argilla:
🙋♀️ Join the Argilla Slack community!
⭐ Argilla Github repo to stay updated.
📚 Argilla documentation for more guides and tutorials.