🧑💻 Log and load data#
This guide showcases some features of the Dataset classes in the Argilla client. The Dataset classes are lightweight containers for Argilla records. These classes facilitate importing from and exporting to different formats (e.g., pandas.DataFrame, datasets.Dataset) as well as sharing and versioning Argilla datasets using the Hugging Face Hub.
For each record type there’s a corresponding Dataset class called DatasetFor<RecordType>. You can look up their API in the reference section
Argilla Records#
The main component of the Argilla data model is called a record. A dataset in Argilla is a collection of these records. Records can be of different types depending on the currently supported tasks:
TextClassificationRecordTokenClassificationRecordText2TextRecord
The most critical attributes of a record that are common to all types are:
text: The input text of the record (Required);annotation: Annotate your record in a task-specific manner (Optional);prediction: Add task-specific model predictions to the record (Optional);metadata: Add some arbitrary metadata to the record (Optional);
Some other cool attributes for a record are:
vectors: Input vectors to enable semantic search.explanation: Token attributions for highlighting text.
In Argilla, records are created programmatically using the client library within a Python script, a Jupyter notebook, or another IDE.
Let’s see how to create and upload a basic record to the Argilla web app (make sure Argilla is already installed on your machine as described in the setup guide):
Create records#
TextClassificationRecord
import argilla as rg

record = rg.TextClassificationRecord(
    text="Hello world, this is me!",
    prediction=[("LABEL1", 0.8), ("LABEL2", 0.2)],
    annotation="LABEL1",
    multi_label=False,
)
TextClassificationRecord
import argilla as rg

record = rg.TokenClassificationRecord(
    text="Michael is a professor at Harvard",
    tokens=["Michael", "is", "a", "professor", "at", "Harvard"],
    prediction=[("NAME", 0, 7), ("LOC", 26, 33)],
)
Text2TextRecord
import argilla as rg

record = rg.Text2TextRecord(
    text="My name is Sarah and I love my dog.",
    prediction=["Je m'appelle Sarah et j'aime mon chien."],
)
Special Metadata Fields#
To facilitate some customization for the usage of metadata fields, we also added some custom metadata fields.
Protected fields#
By adding a leading underscore _ to a random metadata field, we can refrain Argilla from indexing it, which allows us to store the additional info in Elastic without performance loss. So, these metadata fields won’t be used in queries or filters by adding an underscore at the start e.g. _my_field.
Image support#
You can pass a URL in the metadata field _image_url and the image will be rendered in the Argilla UI. You can use this in the Text Classification and the Token Classification tasks. These images need to be hosted on a publicly available URL, or private file servers like NGINX, or Minio.
Argilla Datasets#
Create a Dataset#
The records classes correspond to 3 equivalent datasets:
DatasetForTextClassificationDatasetForTokenClassificationDatasetForText2Text
Under the hood the Dataset classes store the records in a simple Python list. Therefore, working with a Dataset class is not very different from working with a simple list of records, but before creating a dataset we should first define dataset settings and a labeling schema.
Argilla datasets have certain settings that you can configure via the rg.*Settings classes, for example rg.TextClassificationSettings. The Dataset classes do some extra checks for you, to make sure you do not mix record types when appending or indexing into a dataset.
Define a labeling schema#
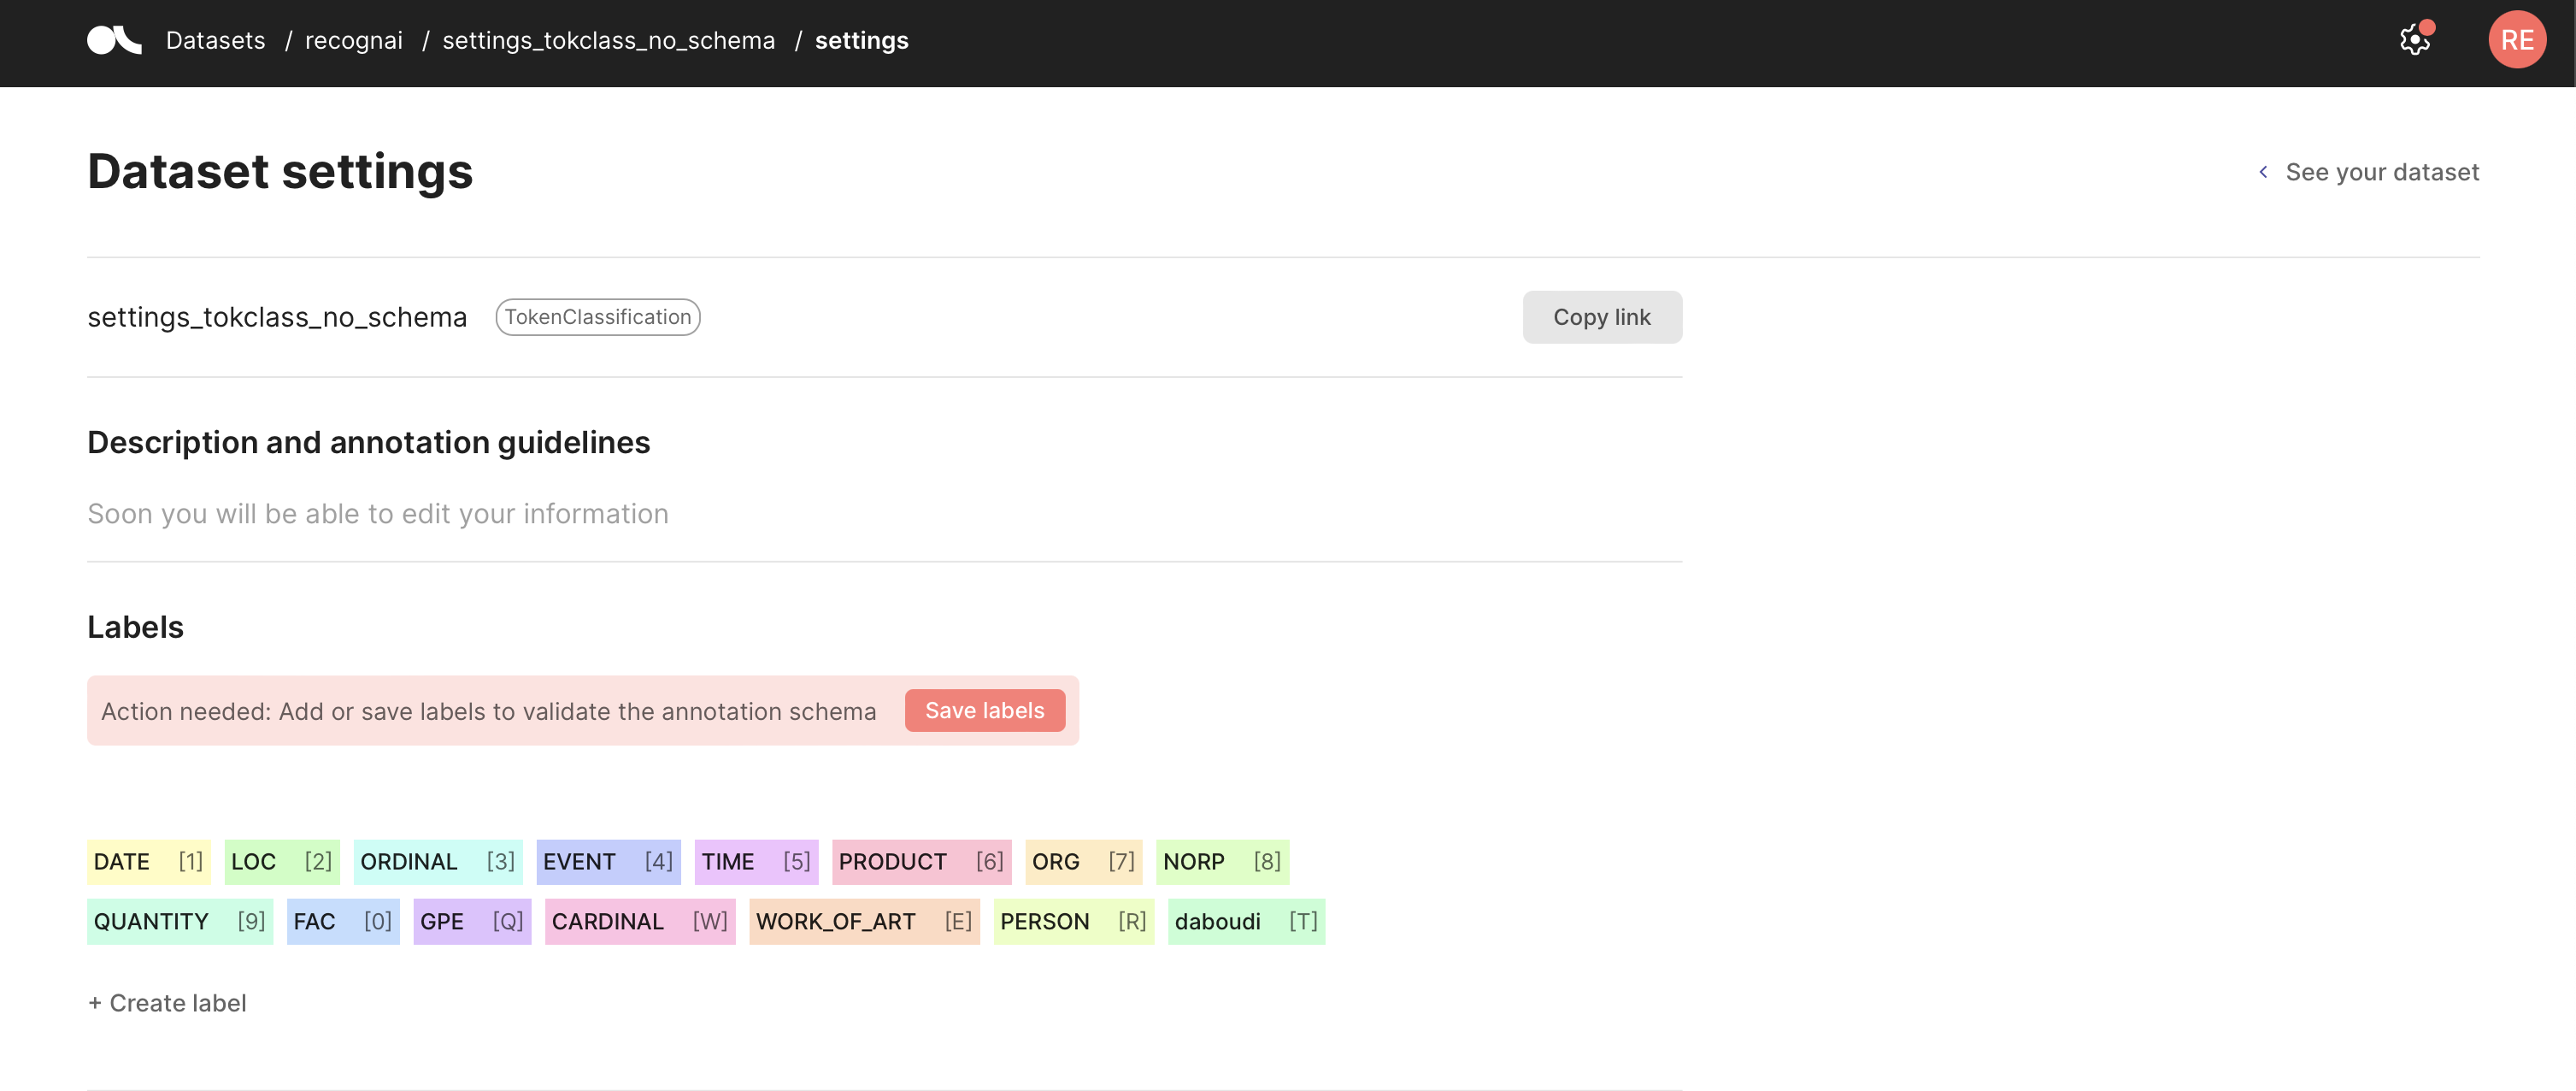
You can define a labeling schema for your Argilla dataset, which fixes the allowed labels for your predictions and annotations. Once you set a labeling schema, each time you log to the corresponding dataset, Argilla will perform validations of the added predictions and annotations to make sure they comply with the schema. You can set your labels using the code below or from the Dataset settings page in the UI.
If you forget to define a labeling schema, Argilla will aggregate the labels it finds in the dataset automatically, but you will need to validate it. To do this, go to your Dataset settings page and click Save schema.
[ ]:
import argilla as rg

# Define labeling schema
settings = rg.TextClassificationSettings(label_schema=["A", "B", "C"])

# Apply settings to a new or already existing dataset
rg.configure_dataset(name="my_dataset", settings=settings)
Log data#
Argilla currently gives users several ways to log model predictions besides the rg.log async method.
Using rg.log#
For this example we show how to use rg.log to create records that will be logged into an existing dataset, with an existing labelling schema. Note that, this needs to be defined before logging data into a dataset.
import argilla as rg

# create a record with correct annotation
valid_record = rg.TextClassificationRecord(text="text", annotation="A")
dataset_rg = rg.DatasetForTextClassification([valid_record])
rg.log(dataset_rg, "my_dataset") or rg.log(valid_record, "my_dataset")
# processed 1 record(s)

# Logging to the newly created dataset triggers the validation checks and prohibits label B
invalid_record = rg.TextClassificationRecord(text="text", annotation="D")
invalid_dataset_rg = rg.DatasetForTextClassification([invalid_record])
rg.log(invalid_dataset_rg, "my_dataset") or rg.log(invalid_record, "my_dataset")
# BadRequestApiError: Argilla server returned an error with http status: 400
Using rg.monitor#
For widely-used libraries Argilla includes an “auto-monitoring” option via the rg.monitor method. Currently supported libraries are Hugging Face Transformers and spaCy, if you’d like to see another library supported feel free to add a discussion or issue on GitHub.
rg.monitor will wrap HF and spaCy pipelines so every time you call them, the output of these calls will be logged into the dataset of your choice, as a background process, in a non-blocking way. Additionally, rg.monitor will add several tags to your dataset such as the library build version, the model name, the language, etc. This should also work for custom (private) pipelines, not only the Hub’s or official spaCy models.
It is worth noting that this feature is useful beyond monitoring, and can be used for data collection (e.g., bootstrapping data annotation with pre-trained pipelines), model development (e.g., error analysis), and model evaluation (e.g., combined with data annotation to obtain evaluation metrics).
[ ]:
import argilla as rg

# using spaCy
import spacy
nlp = spacy.load("en_core_web_sm")
nlp = rg.monitor(nlp, dataset="nlp_monitoring_spacy", sample_rate=1.0)
nlp("I want to monitor this TokenClassification text!")

# using transformers
from transformers import pipeline
nlp = pipeline("sentiment-analysis", return_all_scores=True, padding=True, truncation=True)
nlp = rg.monitor(nlp, dataset="nlp_monitoring", sample_rate=1.0)
nlp("I want to monitor this TextClassification text!")

# using flAIr
from flair.data import Sentence
from flair.models import SequenceTagger
tagger = rg.monitor(SequenceTagger.load("flair/ner-english"), dataset="flair-example", sample_rate=1.0)
sentence = Sentence("I want to monitor this TokenClassification text!")
tagger.predict(sentence)
Using ASGI middleware#
For using the ASGI middleware, see this tutorial.
Load Data#
It is very straightforward to simply load a dataset. This can be done using rg.load. Additionally, you can check our query page for custom info about querying and you can check our vector page for info about vector search.
[ ]:
import argilla as rg

dataset_rg = rg.load(
    name="my_dataset",
    query="my AND query",
    limit=42,
    vectors=("vector1", [0, 42, 1957]),
    sort=[("event_timestamp", "desc")]
)
Update Data#
It is possible to update records from your Argilla datasets using our Python API. This approach works the same way as an upsert in a normal database, based on the record id. You can update any arbitrary parameters and they will be over-written if you use the id of the original record.
[ ]:
import argilla as rg

# read all records in the dataset or define a specific search via the `query` parameter
record = rg.load("my_first_dataset")

# modify first record metadata (if no previous metadata dict you might need to create it)
record[0].metadata["my_metadata"] = "im a new value"

# log record to update it, this will keep everything but add my_metadata field and value
rg.log(name="my_first_dataset", records=record[0])
Import and export Data#
When you have your data in a pandas DataFrame or a datasets Dataset, we provide some neat shortcuts to import this data into a Argilla Dataset. You have to make sure that the data follows the record model of a specific task, otherwise you will get validation errors. Columns in your DataFrame/Dataset that are not supported or recognized, will simply be ignored.
The record models of the tasks are explained in the reference section.
Note
Due to it’s pyarrow nature, data in a datasets.Dataset has to follow a slightly different model, that you can look up in the examples of the Dataset*.from_datasets docstrings.
Pandas#
[ ]:
import argilla as rg

# import data from a pandas DataFrame
dataset_rg = rg.read_pandas(my_dataframe, task="TextClassification")
# or
dataset_rg = rg.DatasetForTextClassification.from_pandas(my_dataframe)

# export back to a pandas DataFrame
dataset_rg.to_pandas()
Datasets library#
We also provide helper arguments you can use to read almost arbitrary datasets for a given task from the Hugging Face Hub.
import argilla as rg
from datasets import load_dataset

my_dataset = load_dataset("argilla/news", split="test")

# import data from a datasets Dataset
dataset_rg = rg.read_datasets(my_dataset, task="TextClassification")
# or
dataset_rg = rg.DatasetForTextClassification.from_datasets(my_dataset)

# export back to a datasets
dataset_rg.to_datasets()
Additionally, we can choose to map certain input arguments of the Argilla records to columns of the given dataset. Let’s have a look at a few examples:
[ ]:
import argilla as rg
from datasets import load_dataset

# the "poem_sentiment" dataset has columns "verse_text" and "label"
dataset_rg = rg.DatasetForTextClassification.from_datasets(
    dataset=load_dataset("poem_sentiment", split="test"),
    text="verse_text",
    annotation="label",
)

# the "snli" dataset has the columns "premise", "hypothesis" and "label"
dataset_rg = rg.DatasetForTextClassification.from_datasets(
    dataset=load_dataset("snli", split="test"),
    inputs=["premise", "hypothesis"],
    annotation="label",
)

# the "conll2003" dataset has the columns "id", "tokens", "pos_tags", "chunk_tags" and "ner_tags"
rg.DatasetForTokenClassification.from_datasets(
    dataset=load_dataset("conll2003", split="test"),
    tags="ner_tags",
)

# the "xsum" dataset has the columns "id", "document" and "summary"
rg.DatasetForText2Text.from_datasets(
    dataset=load_dataset("xsum", split="test"),
    text="document",
    annotation="summary",
)
You can also use the shortcut rg.read_datasets(dataset=..., task=..., **kwargs) where the keyword arguments are passed on to the corresponding from_datasets() method.
Hugging Face hub#
You can easily share your Argilla dataset with your community via the Hugging Face Hub. For this you just need to export your Argilla Dataset to a datasets.Dataset and push it to the hub:
[ ]:
import argilla as rg

# load your annotated dataset from the Argilla web app
dataset_rg = rg.load("my_dataset")

# export your Argilla Dataset to a datasets Dataset
dataset_ds = dataset_rg.to_datasets()

# push the dataset to the Hugging Face Hub
dataset_ds.push_to_hub("my_dataset")
Afterward, your community can easily access your annotated dataset and log it directly to the Argilla web app:
[ ]:
from datasets import load_dataset

# download the dataset from the Hugging Face Hub
dataset_ds = load_dataset("user/my_dataset", split="train")

# read in dataset, assuming its a dataset for text classification
dataset_rg = rg.read_datasets(dataset_ds, task="TextClassification")

# log the dataset to the Argilla web app
rg.log(dataset_rg, "dataset_by_user")
Database Migration Management#
Migrating from old schema#
For old Argilla versions, labels created from the UI were not included as part of a labelling schema. Instead, the UI used the dataset metadata index in Elastic Search to store this information.
Warning
From Argilla version v1.4.0, all labels will be created using the new label schema settings. Be sure to migrate datasets with labels created using the UI to the proper label schema.
If you want to move this info to the corresponding label schema, you can execute the next code snippet:
Here is a code snippet showing how to do it
[ ]:
import argilla as rg
from argilla.client import api

rg.init()
client = api.active_client()

# This metadata key was used by the UI to store created labels in datasets
CUSTOM_DATA_KEY = "rubrix.recogn.ai/ui/custom/userData.v1"
datasets = [dataset for dataset in client.http_client.get("/api/datasets") if CUSTOM_DATA_KEY in dataset["metadata"]]
print(f"Found {len(datasets)} datasets to migrate")
for ds in datasets:
    metadata = ds["metadata"]
    task = ds["task"]
    name = ds["name"]
    workspace = ds["owner"]  # owner will be replaced by `workspace` in newer versions

    if task == "TextClassification":  # Build text classification settings
        labels = metadata[CUSTOM_DATA_KEY]["labels"]
        settings = rg.TextClassificationSettings(label_schema=set(labels))
    elif task == "TokenClassification":  # Build token classification settings
        labels = metadata[CUSTOM_DATA_KEY]["entities"]
        settings = rg.TokenClassificationSettings(label_schema=set(labels))
    else:
        raise Exception(f"No labels key for task {task}. {dataset}")

    # Setting the dataset workspace to work with current dataset
    rg.set_workspace(workspace)

    # We will complete labels schema with labels found in dataset records.
    # This will avoid errors on label schema validation (when labels in records are not present in the label schema)
    metrics = client.compute_metric(name=name, metric="dataset_labels")
    for label in metrics.results["labels"]:
        settings.label_schema.add(label)
    print(f"Settings labels for dataset '{name}': {settings}")
    rg.configure_dataset(name=name, settings=settings)
[ ]:
import argilla as rg
from argilla.client import api

rg.init()
rg_client = api.active_client()

new_workspace = "<put-target-workspace-here>"

empty_workspace_datasets = [
    ds["name"]
    for ds in rg_client.http_client.get("/api/datasets")
    # filtering dataset with no workspace (use `"owner"` if you're running this code with server versions <=1.3.0)
    if not ds.get("workspace", None)
]

rg.set_workspace("")  # working from the "empty" workspace

for dataset in empty_workspace_datasets:
    rg.copy(dataset, dataset, new_workspace)

# Dataset are normally copied to the provided workspace
# You should delete datasets with no workspace
# In that case, uncomment following lines
# for dataset in empty_workspace_datasets:
#    rg.delete(dataset)
Reindex a Dataset#
Sometimes updates require us to reindex the data.
Argilla Metrics#
For our internally computed metrics, this can be done by simply, loading and logging the same records back to the same index. This is because our internal metrics are computed and updated during logging.
[ ]:
import argilla as rg

dataset = "my-outdated-dataset"
ds = rg.load(dataset)
rg.log(ds, dataset)
Elasticsearch#
For Elastic indices, re-indexing requires a bit more effort. To be certain of a proper re-indexing, we requires loading the records, and storing them within a completely new index.
[ ]:
import argilla as rg

dataset = "my-outdated-dataset"
ds = rg.load(dataset)
new_dataset = "my-new-dataset"
rg.log(ds, new_dataset)
Next steps#
If you want to continue learning Argilla:
🙋♀️ Join the Argilla Slack community!
⭐ Argilla Github repo to stay updated.
📚 Argilla documentation for more guides and tutorials.